
It’s been a long, hot, crazy summer, but made a little less hot and a little more enjoyable by your Portacool. However, as we move into fall, it’s time to put your Portacool away for the winter. Here are the steps to take to make sure it’s ready for use when the heat starts to rise again in the spring.
Always unplug your Portacool portable evaporative cooler before starting to work on it. Then empty the reservoir by unscrewing the drain located at the bottom or back of the unit. Not sure where it’s at? You can check your manual to find your drain location.
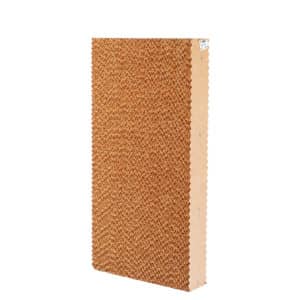
Your Kuul Comfort™ evaporative media is the heart of your Portacool portable evaporative cooler. It’s the brown, honeycomb material located at the back of the cooler. You want to make sure this is dry before you put the Portacool away for storage. For some models, you can turn the pump off and run the fan for 15 minutes to facilitate drying. Otherwise, you will have to lift the damp media out and let it air dry.
You will need a Philips head screwdriver to access the media. For some tall models, like the Jetstream 250, 260, or 270, you might need a ladder to access the screws. Remove the screws from the evaporative media flap, then you can slide the media out. The media can be brittle, so use care when lifting it out of the Portacool. Place it on a flat surface to air dry.
With the evaporative media removed, you will have easy access to the reservoir. If there is a significant amount of dirt and debris, you can wait until the reservoir dries and vacuum up the debris or use a wet/dry shop-vac to clean it.
Once most of the dirt is removed, clean the reservoir with soap and water, then rinse thoroughly.
Once the evaporative media and the reservoir are completely dry, you can reinstall the evaporative media. The media should simply slide back in place but use the directional stickers to make sure you have it facing the right direction.
Once the media is in place, refasten the evaporative media flap with the screws.
Covering your Portacool portable evaporative cooler over the winter will prevent dust build up. It will also extend the life of your evaporative media. You can also cover the Portacool with an old sheet, tarp or dust cover. Portacool’s protective covers are designed specifically for your Portacool and are available from Portacool online or from one of our designated retailers near you. These specially shaped covers are easy to use, ensure your unit is properly covered, and look visually appealing for open spaces like your patio corner or open garage.
Choose a storage place for your Portacool that is dry and out of the way. Roll the evaporative cooler to the storage location and lock the casters.
Resist the temptation to stack anything on top of the Portacool. Fluid leaks can contaminate your evaporative media and heavy items could damage the unit.
You have now completed all the steps to make sure your Portacool is ready for the spring. When the weather gets hot again, you can simply roll it out, fill it up, and plug it in to enjoy the powerful cooling of your Portacool portable evaporative cooler.
Looking for an additional Portacool to deliver the comfort you need? Find a retailer near you.